¶ Introduction
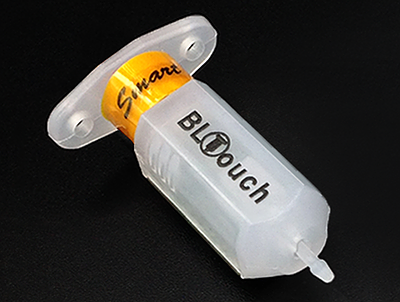
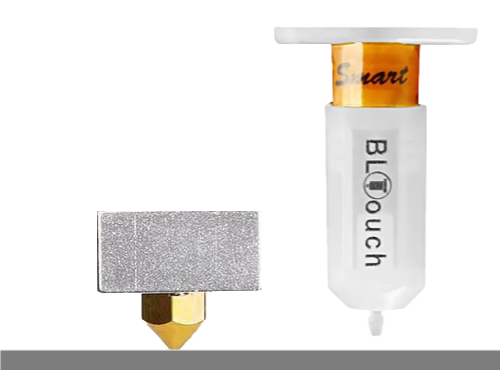
BLTouch is an automatic bed leveling sensor for 3D printers created by Paris Kyung-Yeon Lee (ANTCLABS). BLTouch does not uses either optical, nor proximity (inductive / capacitive) sensor. It is controlled by hall effect, providing high precision and it works with any kind of bed material.
There two kinds of BLTouch sensors:
- BLTouch Classic : The original BLTouch
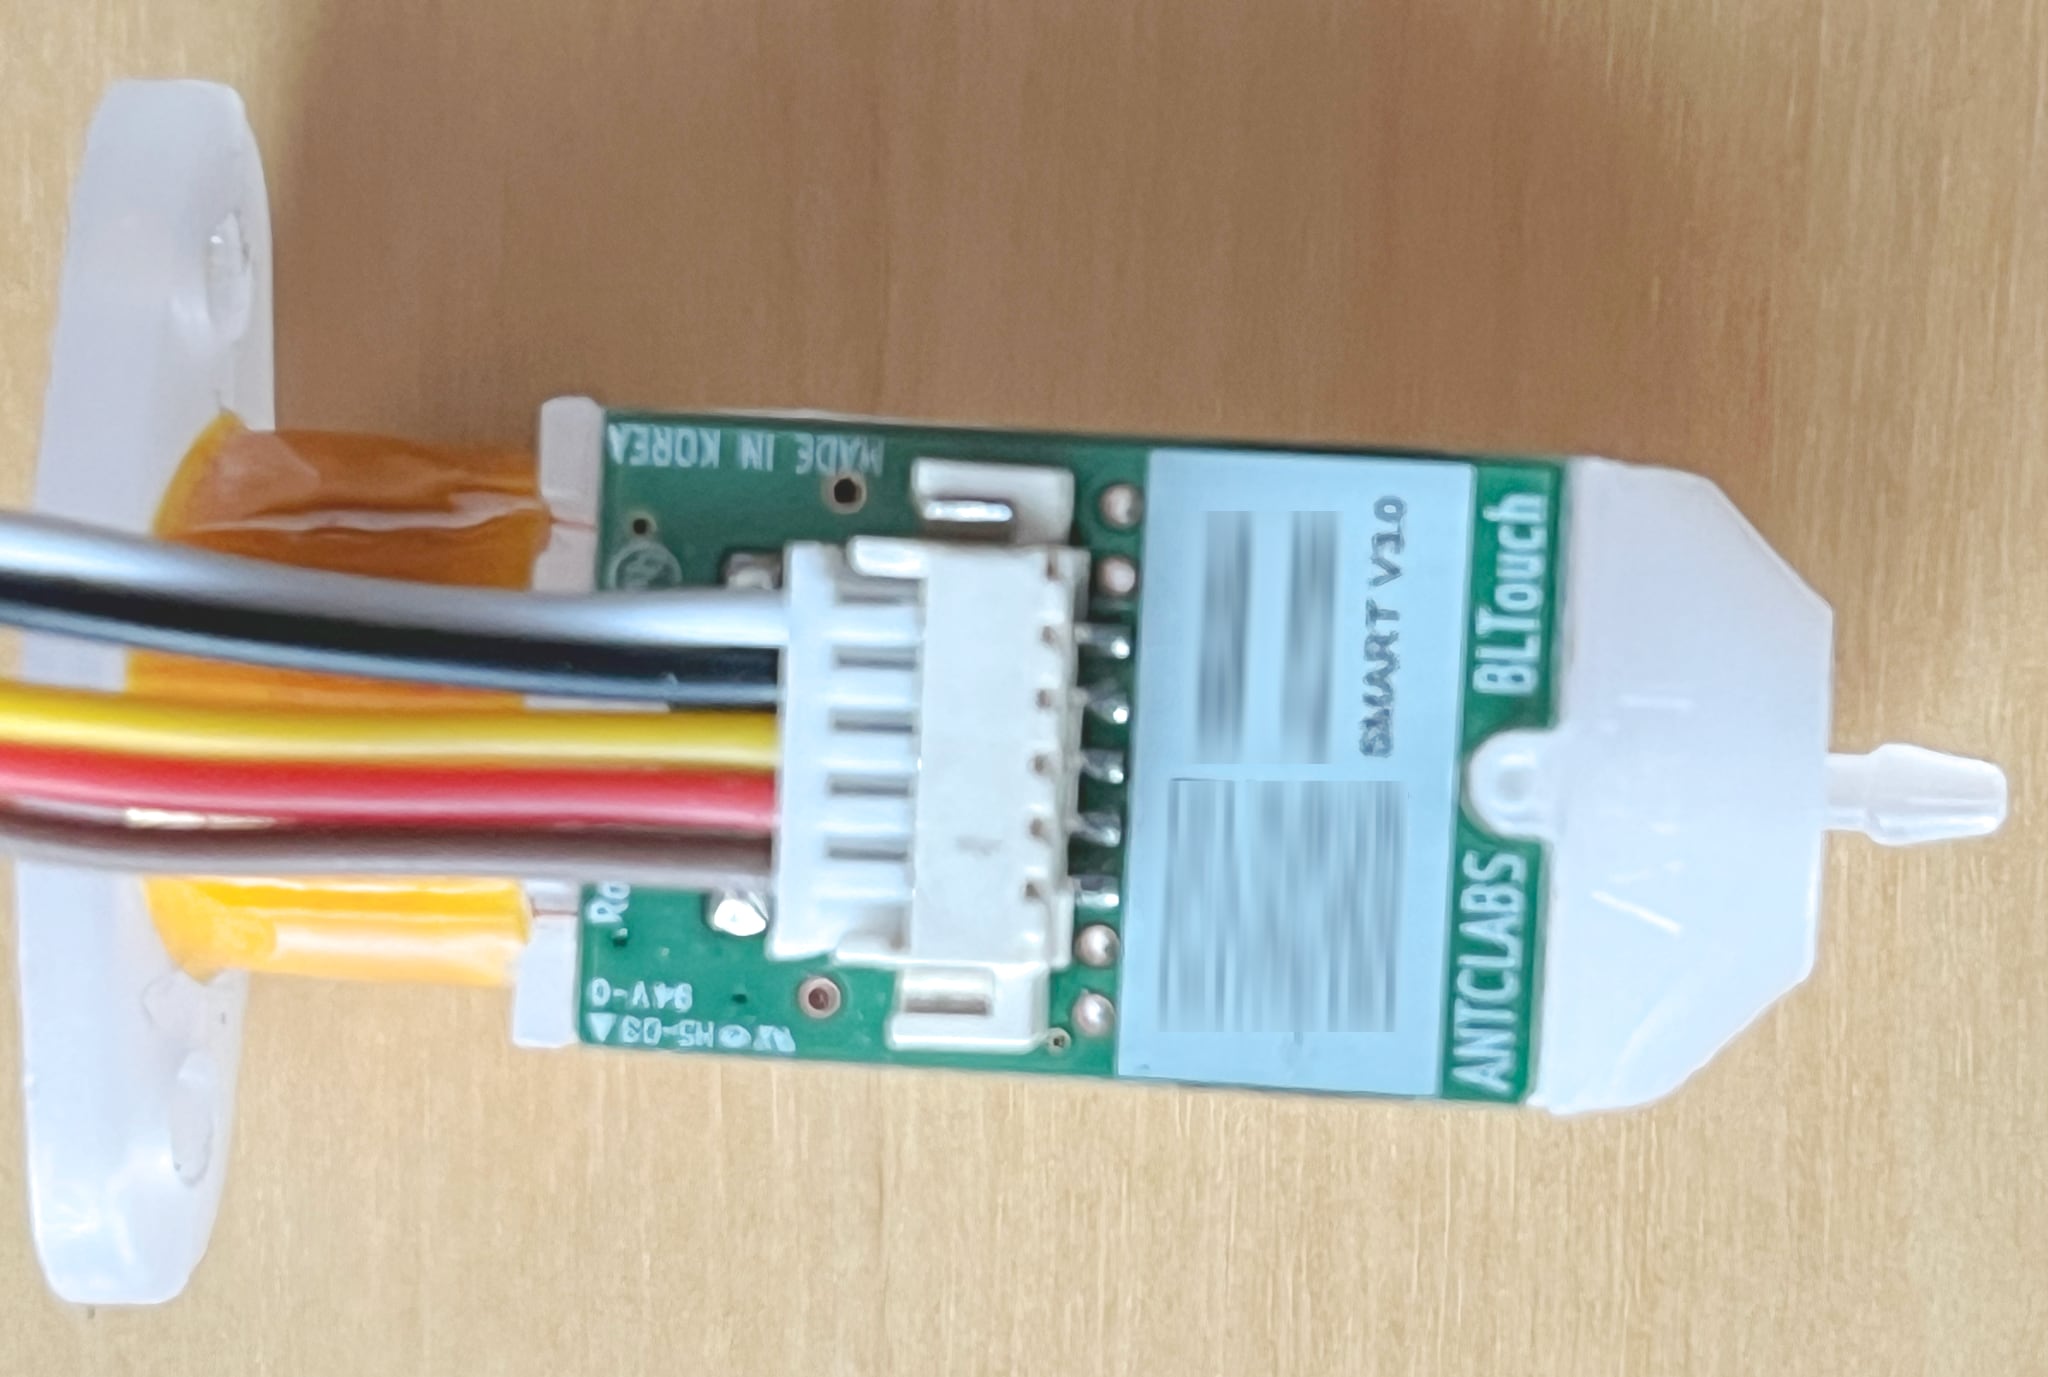
- BLTouch Smart : The latest version of BLTouch Smart is version 3.1.
¶ BLTouch clones
ADVi3++ works probably with BLTouch clones but at your own risks. Those clones are often poorly made and do not behave exactly like an genuine BLTouch.
I do not provide support for BLTouch clones.
¶ Compatibility
ADVi3++ supports BLTouch Classic version 1.2 and 1.3, BLTouch Smart version 1.0, 2.0, 2.2, 3.0 and 3.1 with the all Wanhao i3 Plus printers and clones, including Mark II ones. The this later case, the BLTouch replaces the existing sensor that is less precise.
¶ Z endstop (min)
ADVi3++ does not use the existing Z endstop. For Wanhao i3 Plus and perfect clones, you can choose to disconnect and remove it or to leave it. If you leave it, be sure that the bed does not go too far down and that it does not break the endstop.
For Aldi Balco 3D Printer (model HE180021), you have to remove it since it is replaced by the BLTouch.
¶ Installing BLTouch
¶ Step 1 - Print a support
In the past, I have made some supports. But since then, other people have made better supports than mine so I recommend them:
- If you have move the front fan behind the printer, I recommend the Indianagio Front support : BLTouch support made by Giorgio Baseggio (Indianagio)
- Otherwise, the Teaching Tech L. Side support is also very good : BLTouch support made by Michael Laws (TeachingTech)
¶ Step 2 - Install the support and BLTouch
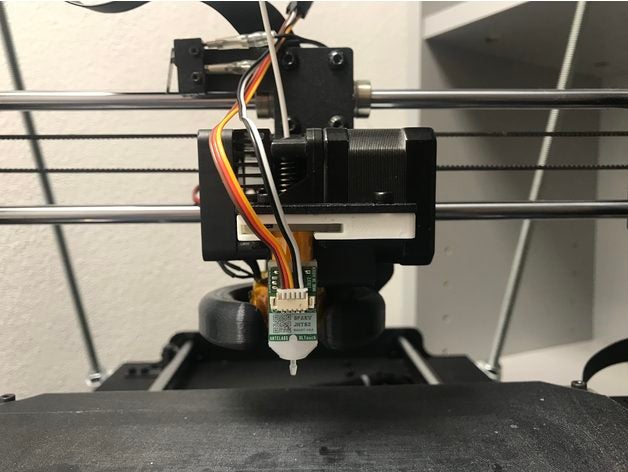
Install the BLTouch in the support and then install the support on your printer.
IMPORTANT: You must ensure that the tip of the BLTouch (when retracted) will never touch the bed:
It depends of the support you are using but also of the way your hot-end is assembled. If your nozzle is too high, you may have to dismantle the hot-end and move the position of the thermal barrier tube relative to the cooling block.
¶ Step 3 - Soldering headers
¶ For Wanhao i3 Plus printers and exact clones
IMPORTANT: If you have a Aldi Balco 3D Printer model HE180021, do not follow these instructions but the specific instructions in the next part.
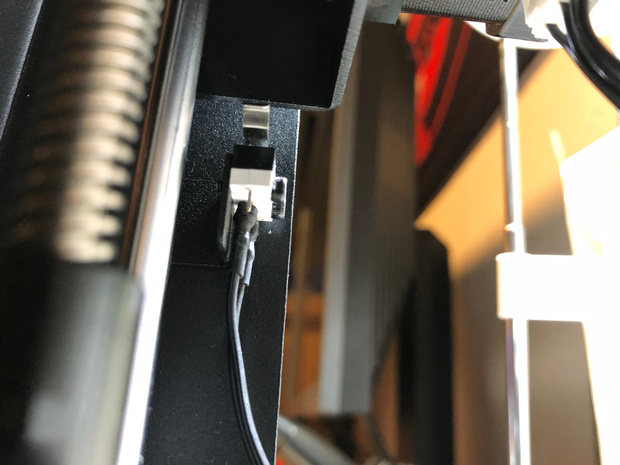
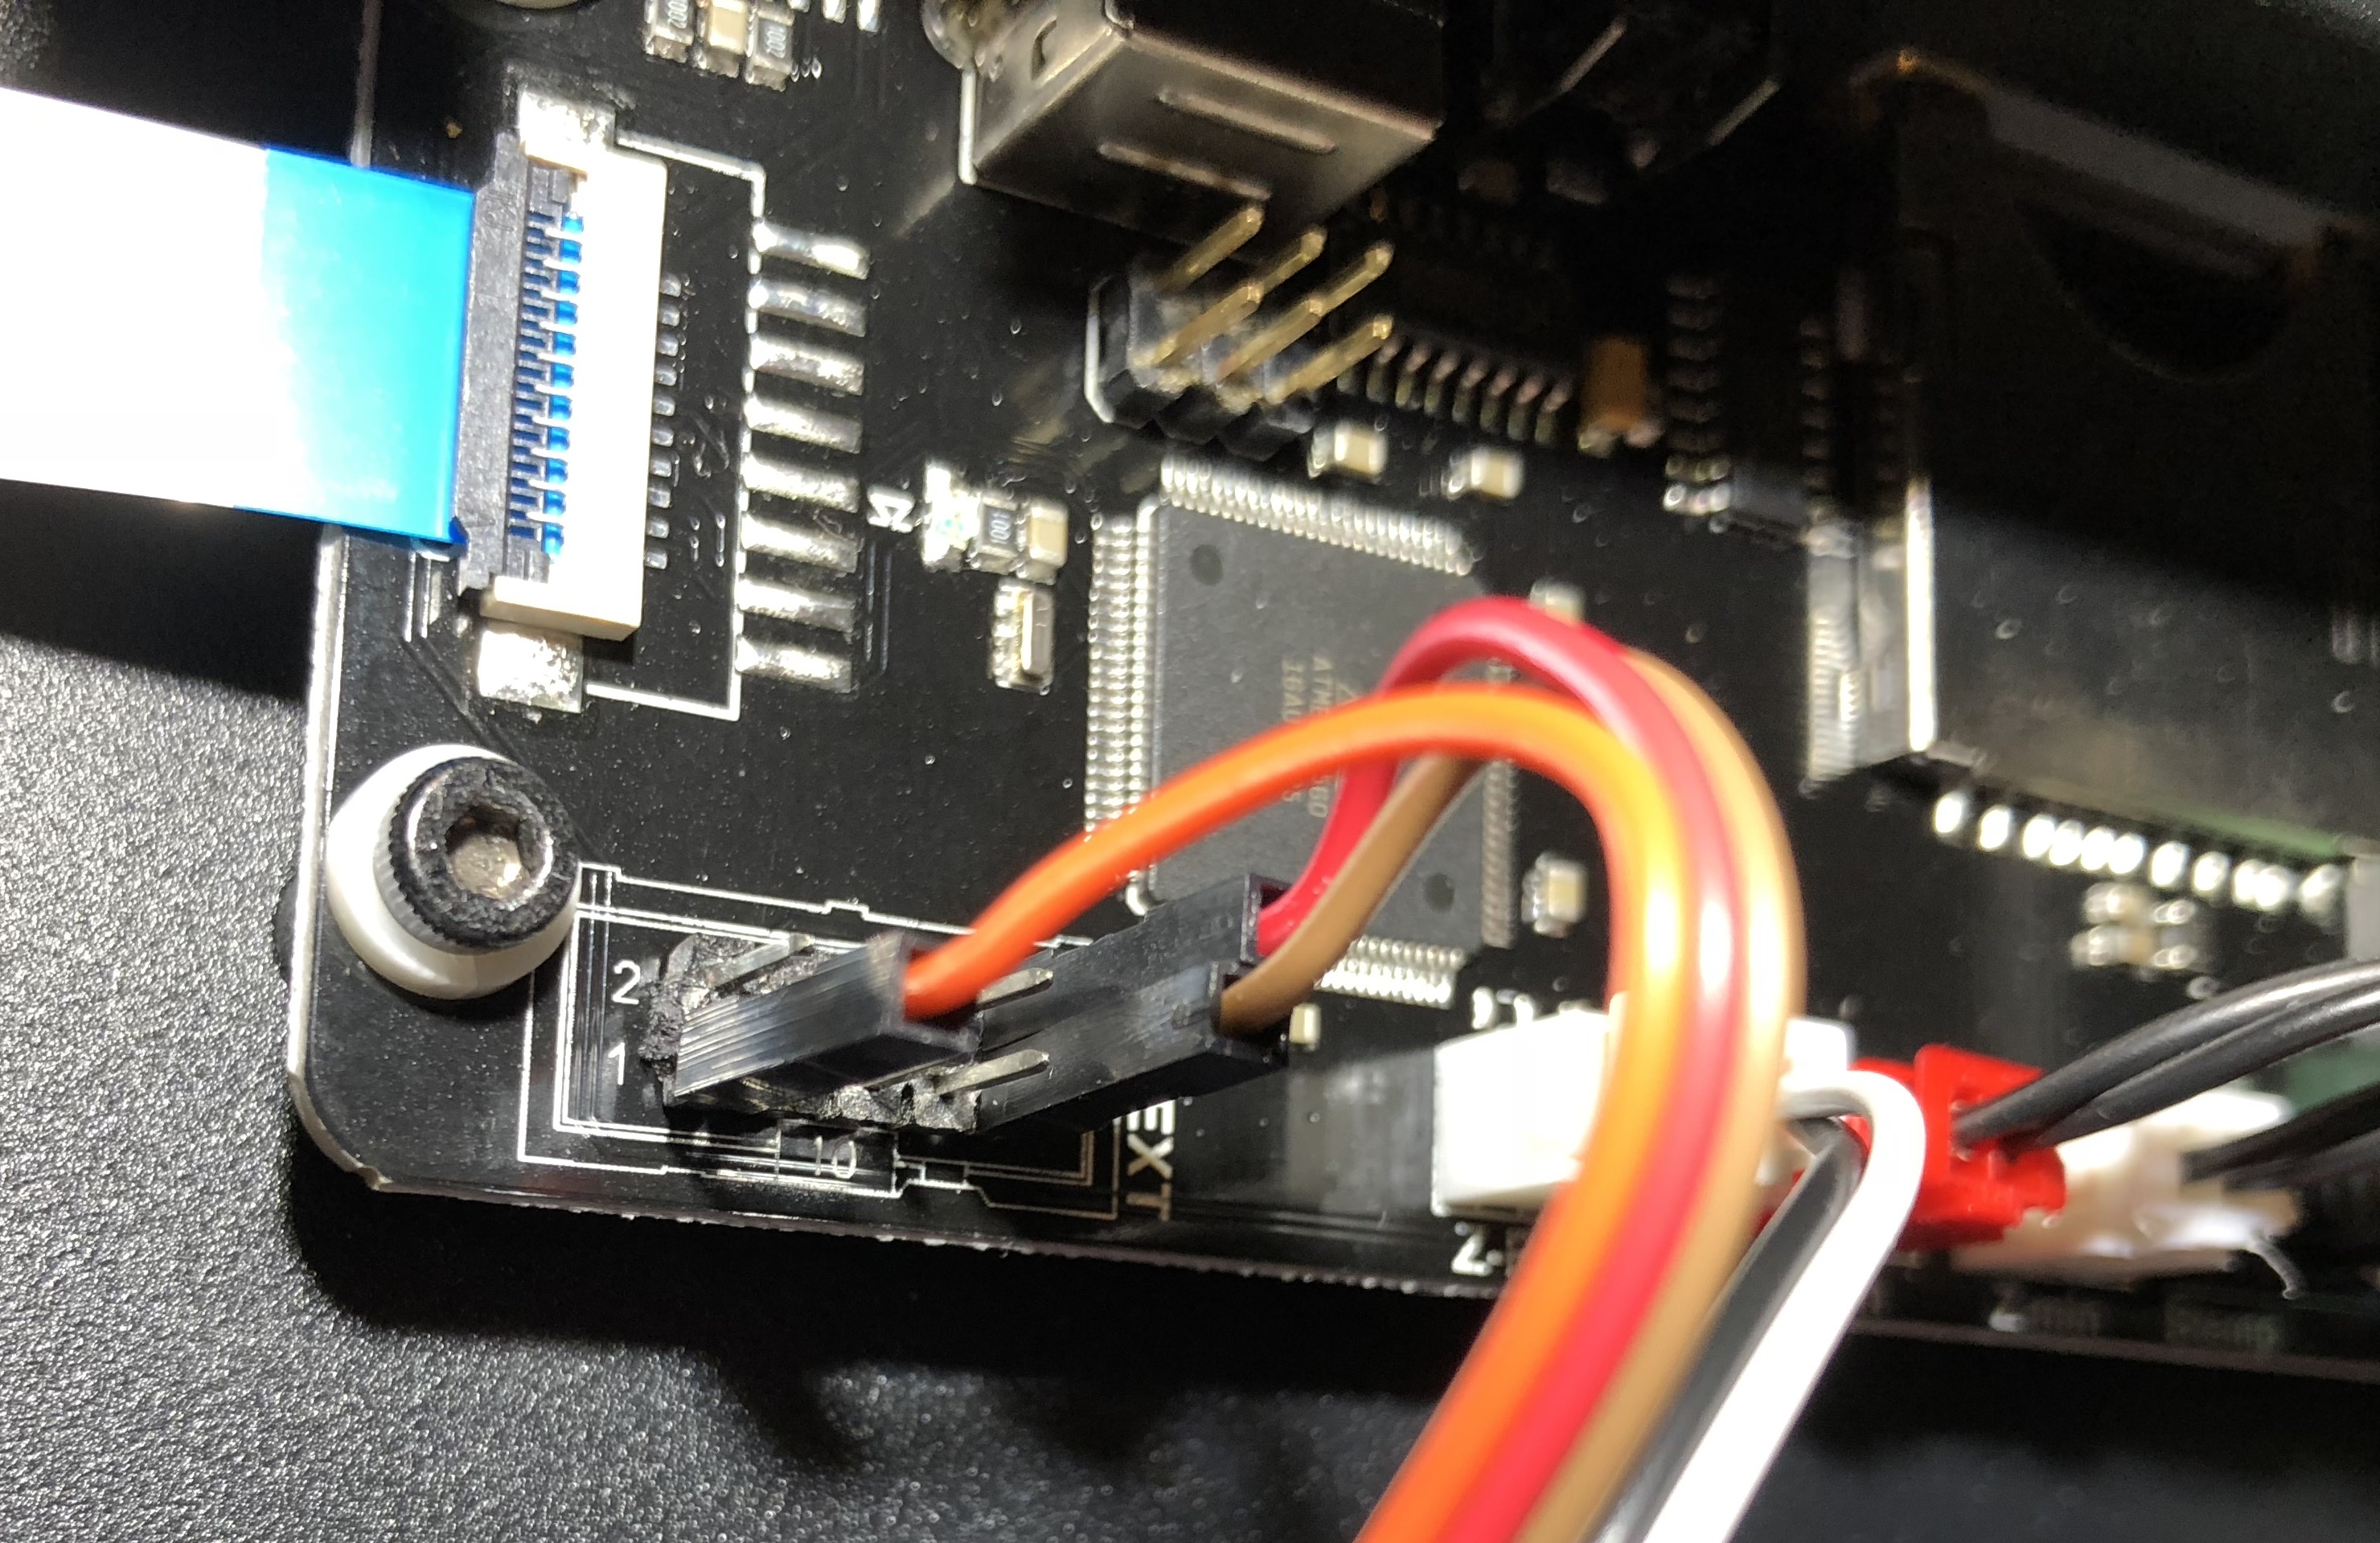
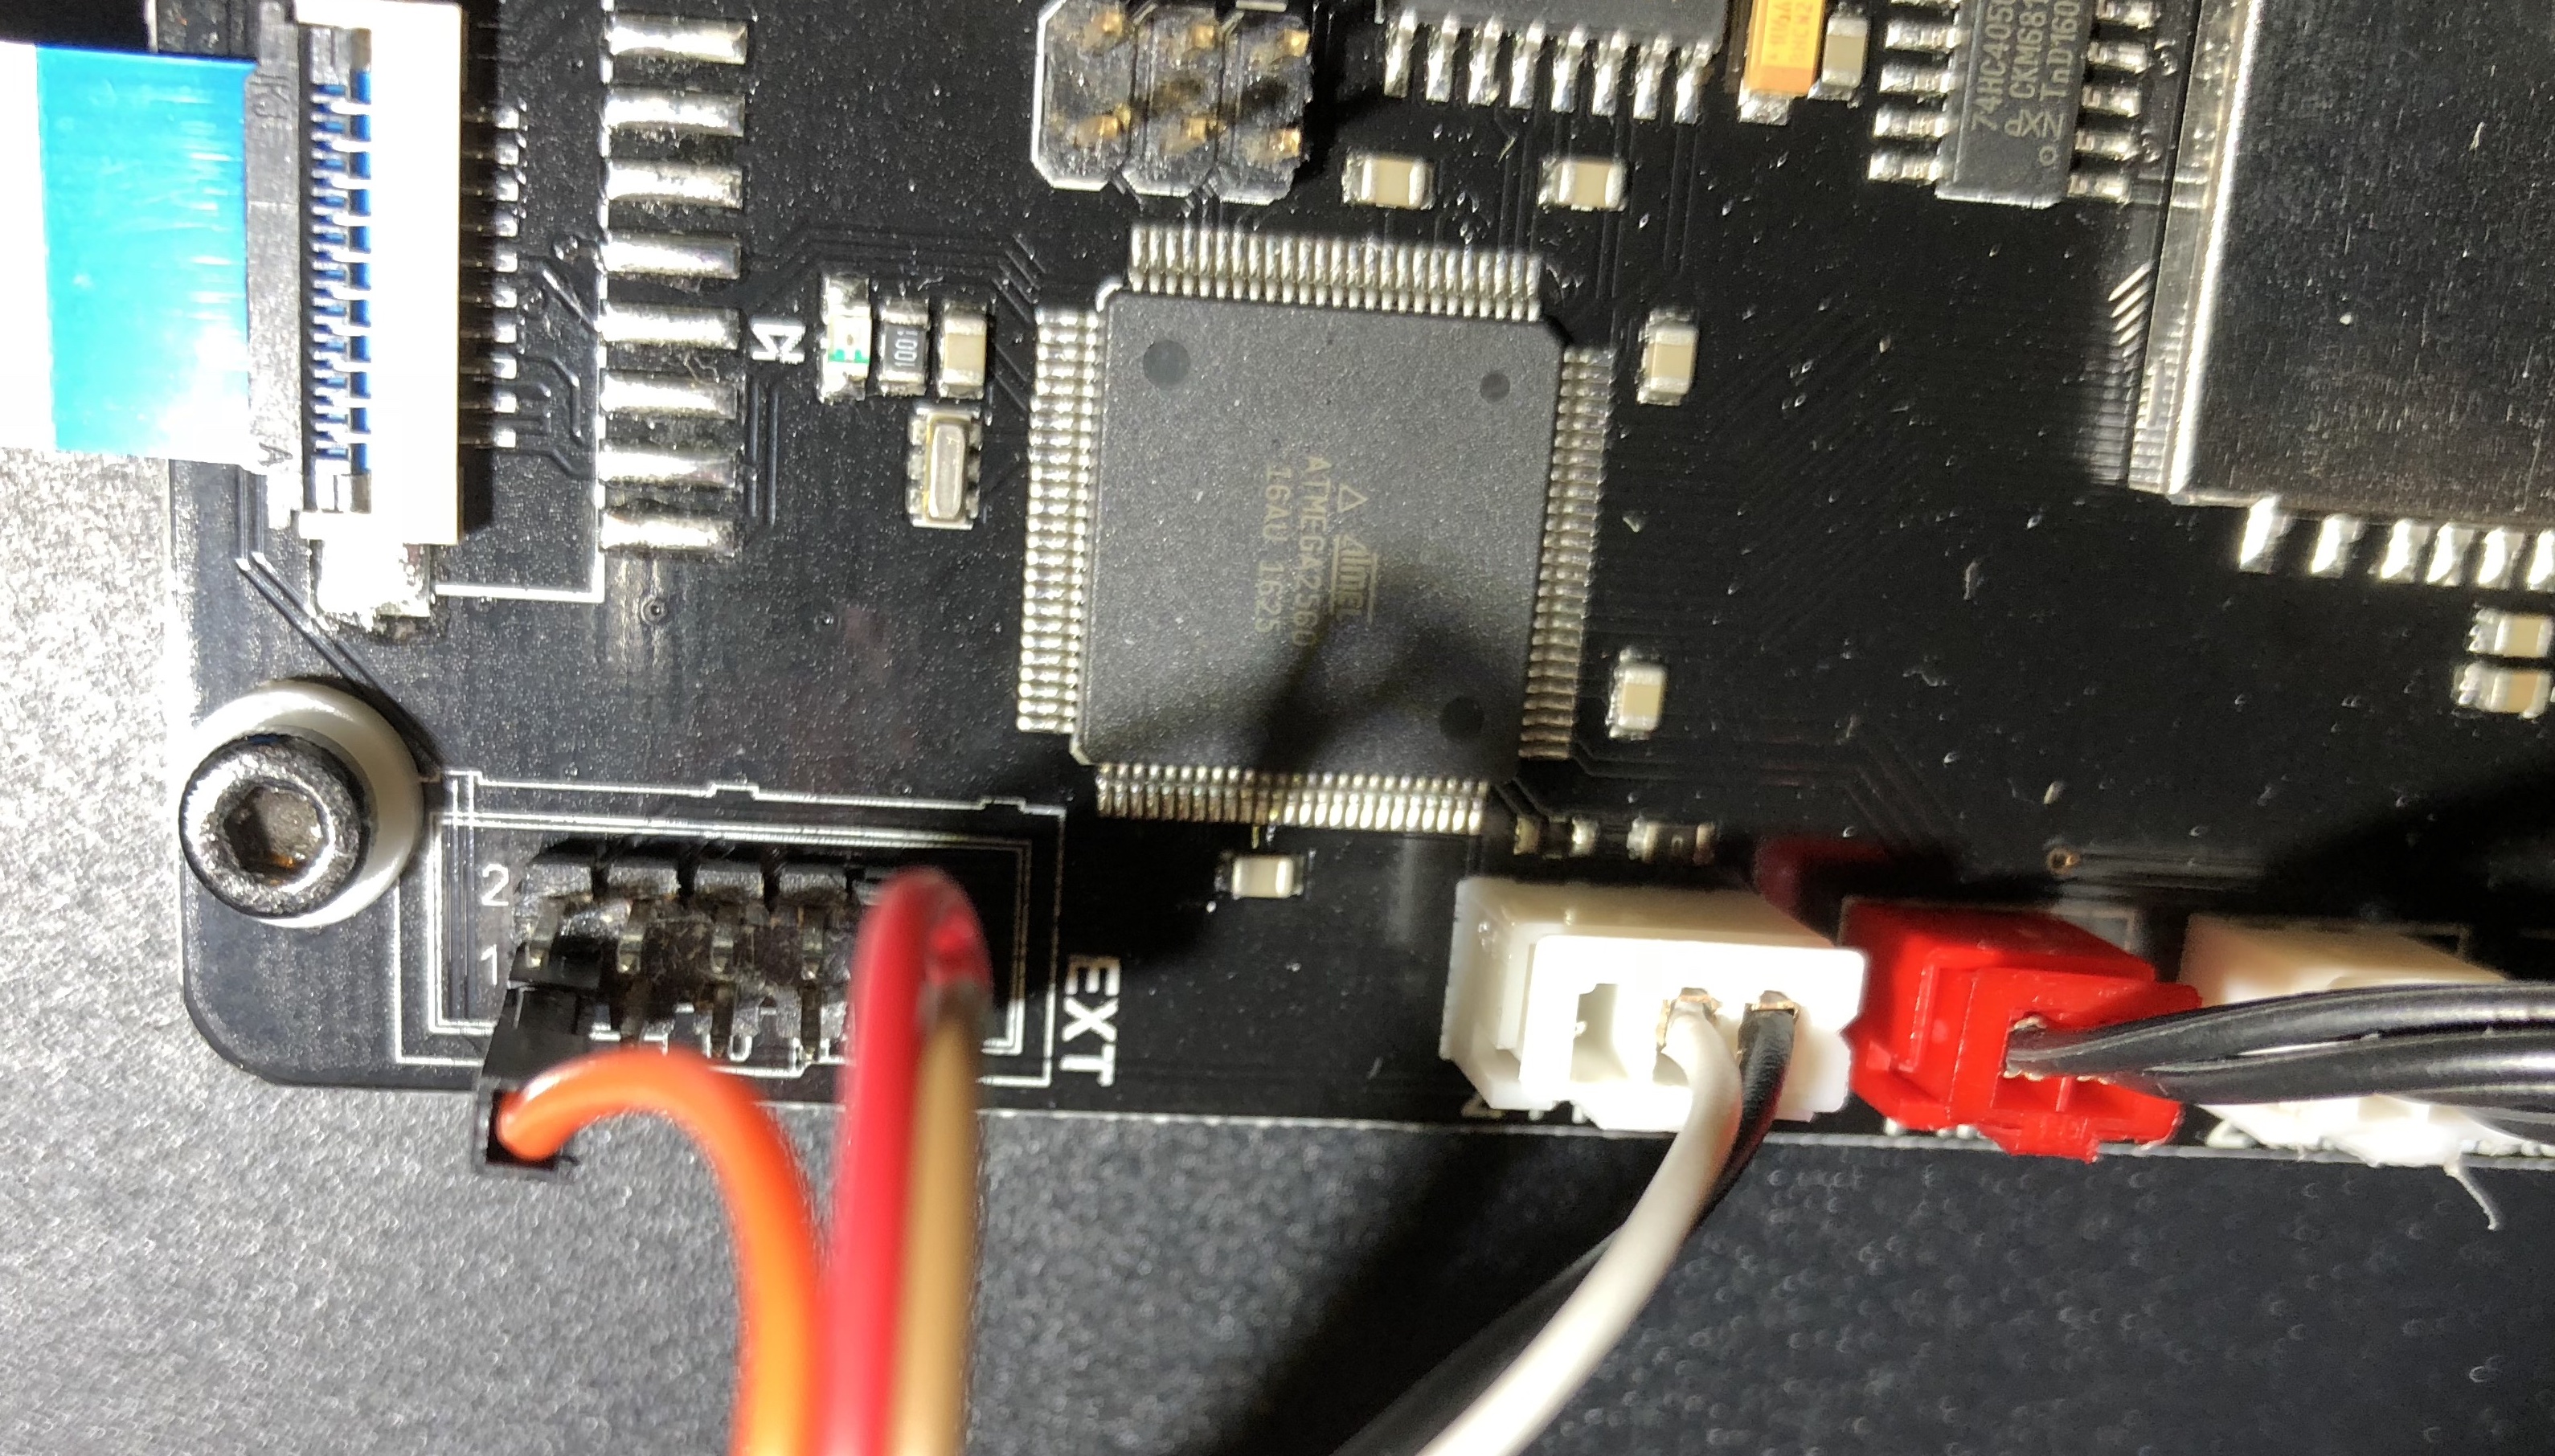
For Wanhao i3 Plus printers (and exact clones), ADVi3++ uses the EXT and the Z-probe connectors on the mainboard:
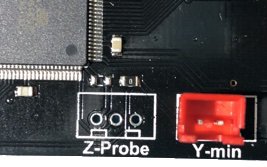
However, these connectors are naked and you have to solder heads or connectors:
-
For the Z-probe connector, I have used a standard JST XHP connector
-
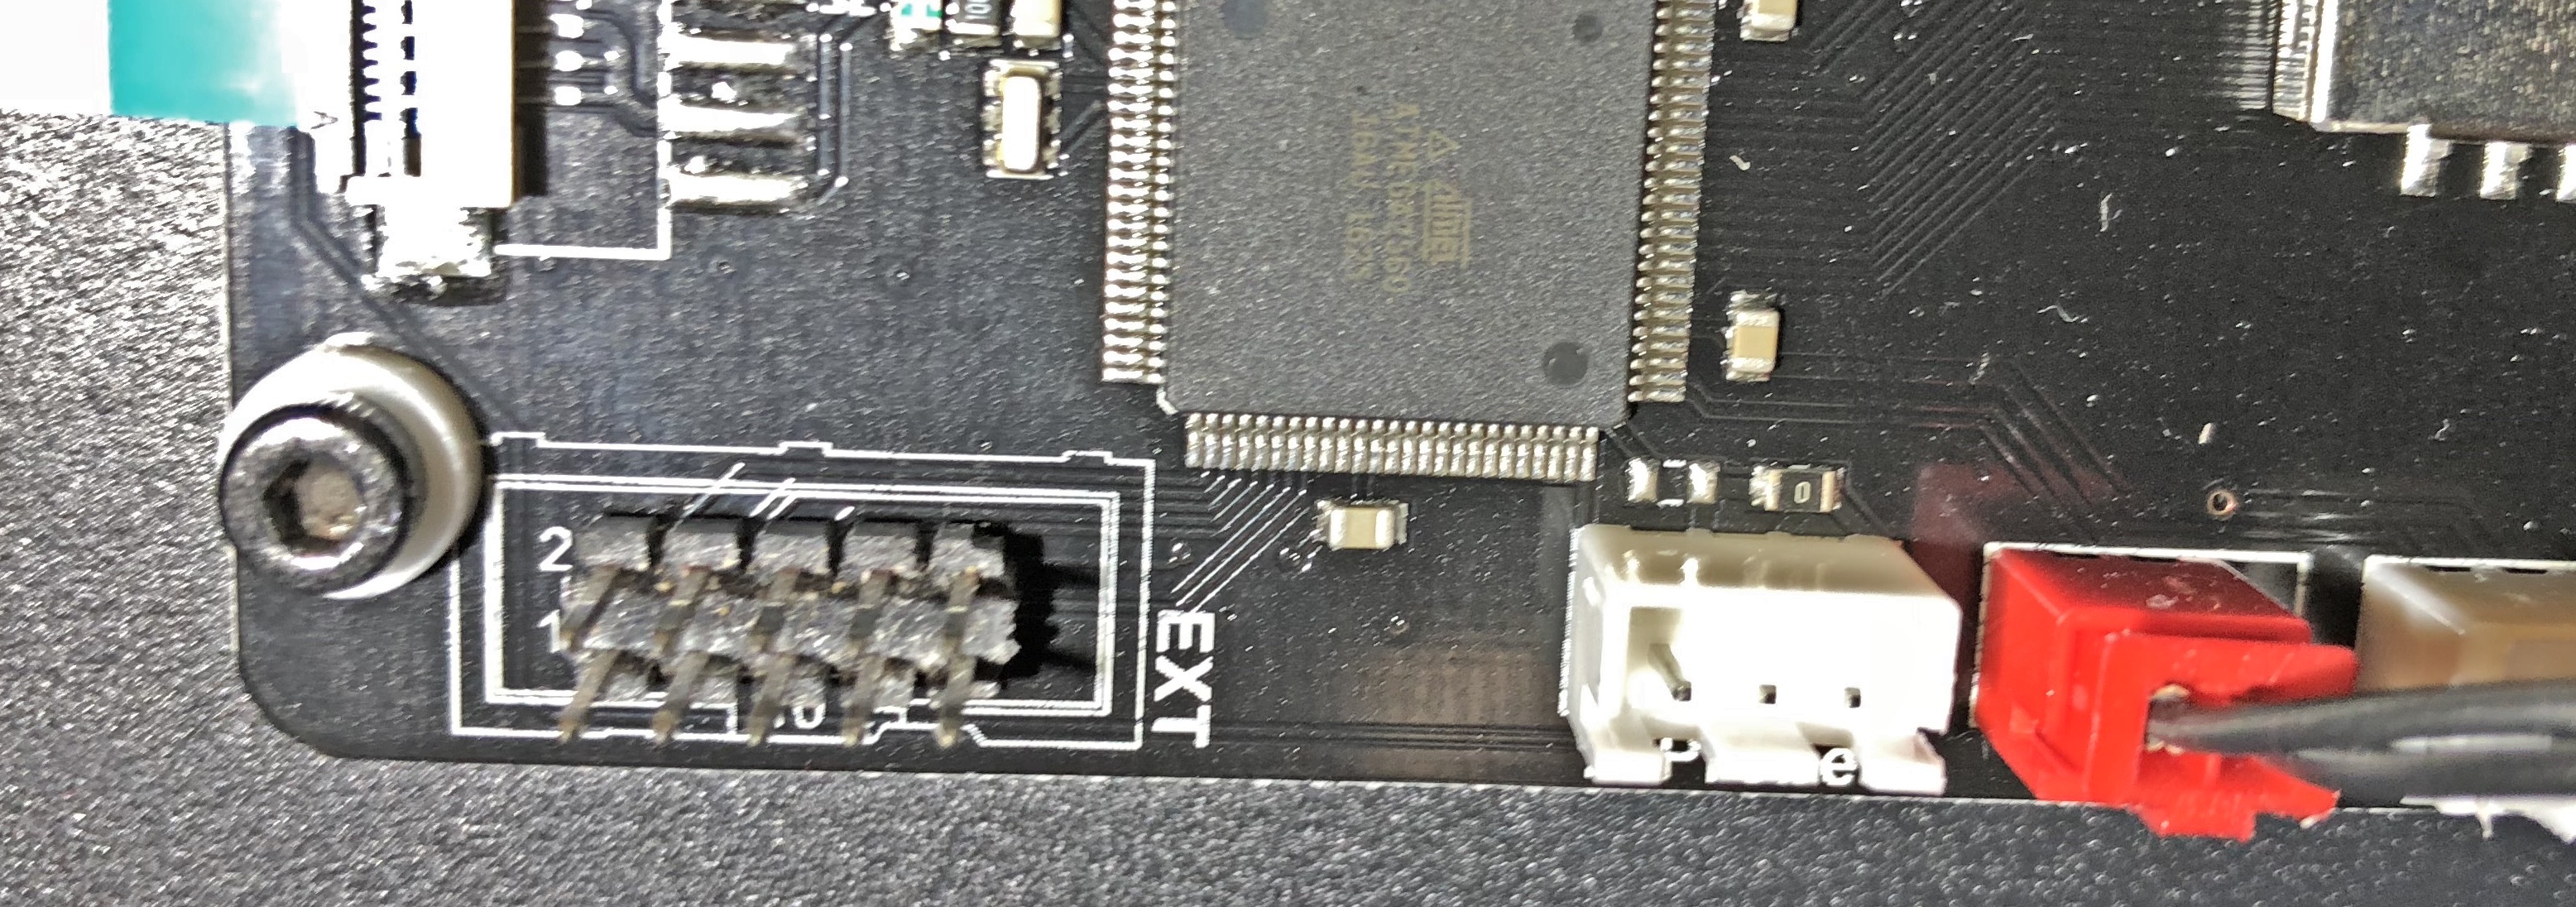
For the EXT connector, I have used a standard Dupont male connector head. You can find many kits (male and female) either in your local store or in Internet shops.
Do not try to fix wires with some glue or something similar. It will not work. You have to solder. And yes, it is recommended to remove completely the mainboard from the case to solder heads. It is not that complicated. Put labels on ribbon cables to plug them back properly.
You will obtain something like that:
IMPORTANT: After soldering, be sure to clean the flux with, for example, isopropyl alcohol. Solder often contains some flux and this flux may be conductive.
¶ For Aldi Balco 3D Printer (model HE180021) only
The mainboard of this printer (version 5.2C), there is no Z-probe connector. So instead, ADVI3++ uses the Z-min. It also uses the EXT connector like for the other models:
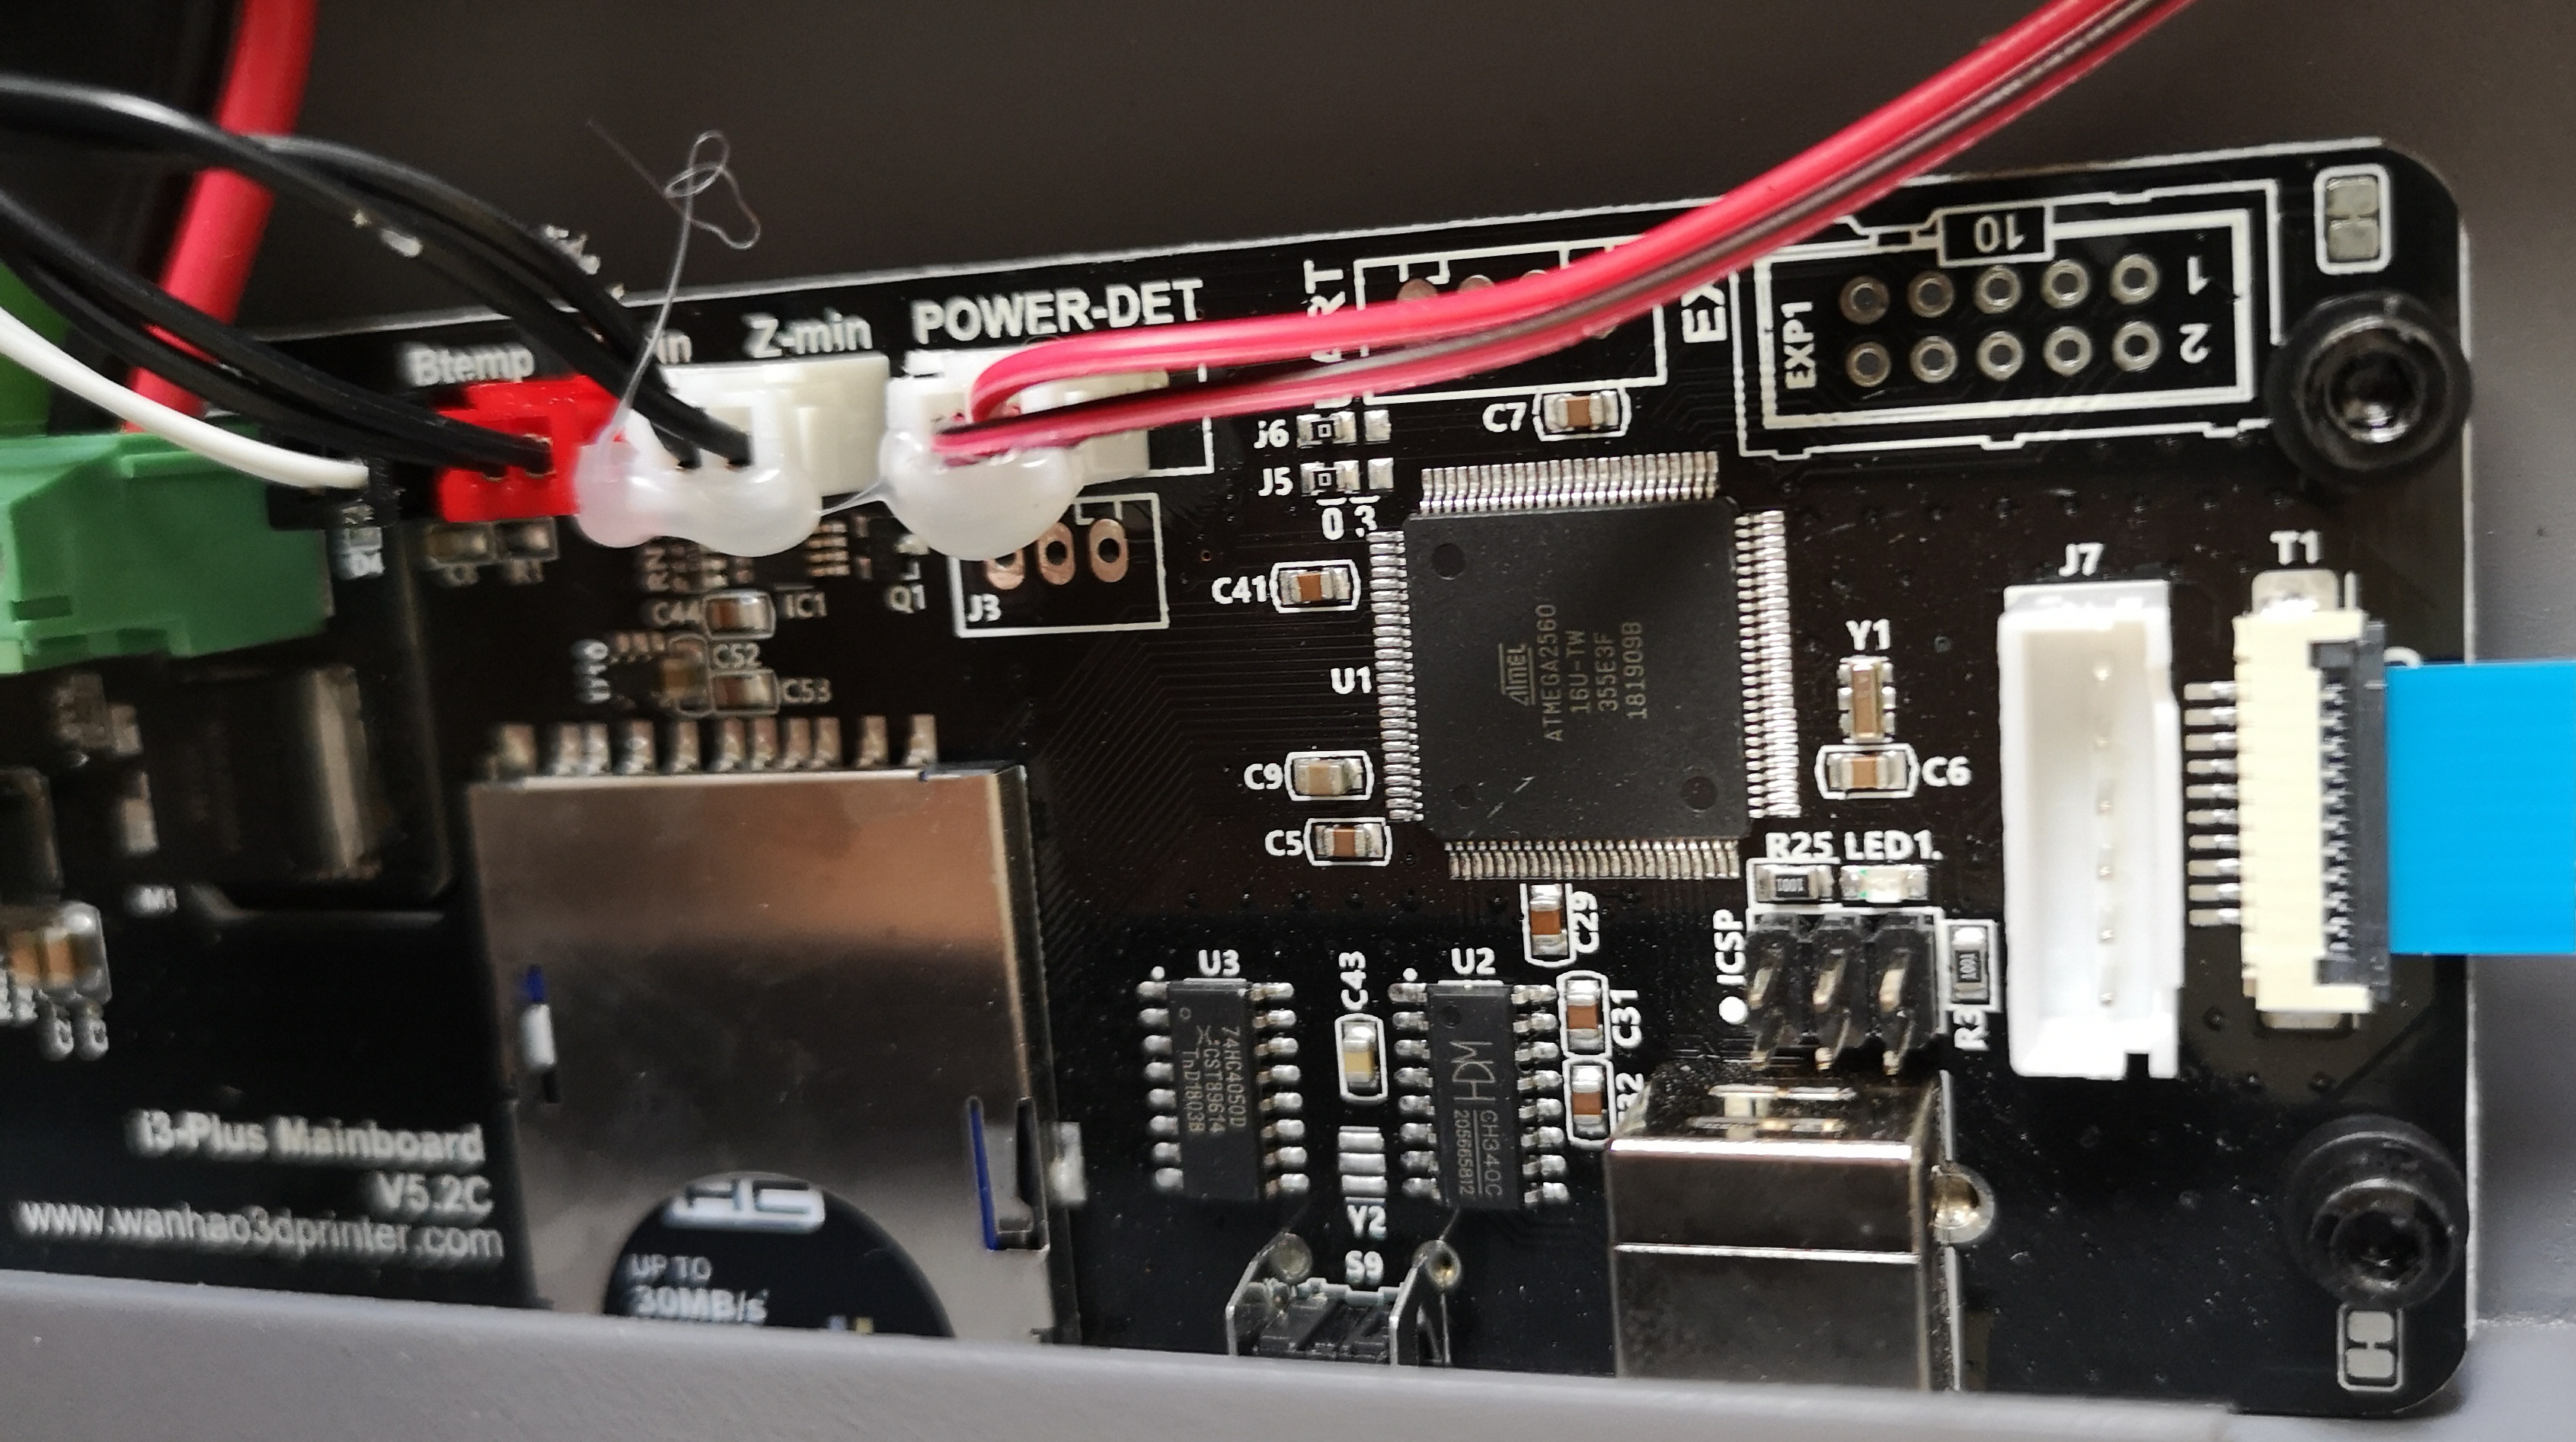
Image credit: willsteeleuk
-
For the EXT connector, I have used a standard Dupont male connector head. You can find many kits (male and female) either in your local store or in Internet shops.
-
The Z-min connector is currently used by the Z endstop micro switch. Unplug it. ADVi3++ use the BLTouch instead.
Do not try to fix wires with some glue or something similar. It will not work. You have to solder. And yes, it is recommended to remove completely the mainboard from the case to solder heads. It is not that complicated. Put labels on ribbon cables to plug them back properly.
¶ Step 4 - Wiring
The next step is to wire the BLTouch sensor. You will need a cable of approximately 1.35 m with 5 wires.
Important:
-
Be careful with colors of wires. If the colors are not the same than in the pictures below (brown, red, orange, black, white), your BLTouch is probably not genuine and is a clone. Colors can be also mixed-up by some extension cables.
-
If you buy or build yourself an extension cable, be sure to use the right connector on the BLTouch side. It is NOT a JST GH connector but a Molex PicoBlade.
¶ For Wanhao i3 Plus printers and exact clones
IMPORTANT: If you have a Aldi Balco 3D Printer model HE180021, do not follow these instructions but the specific instructions in the next part.
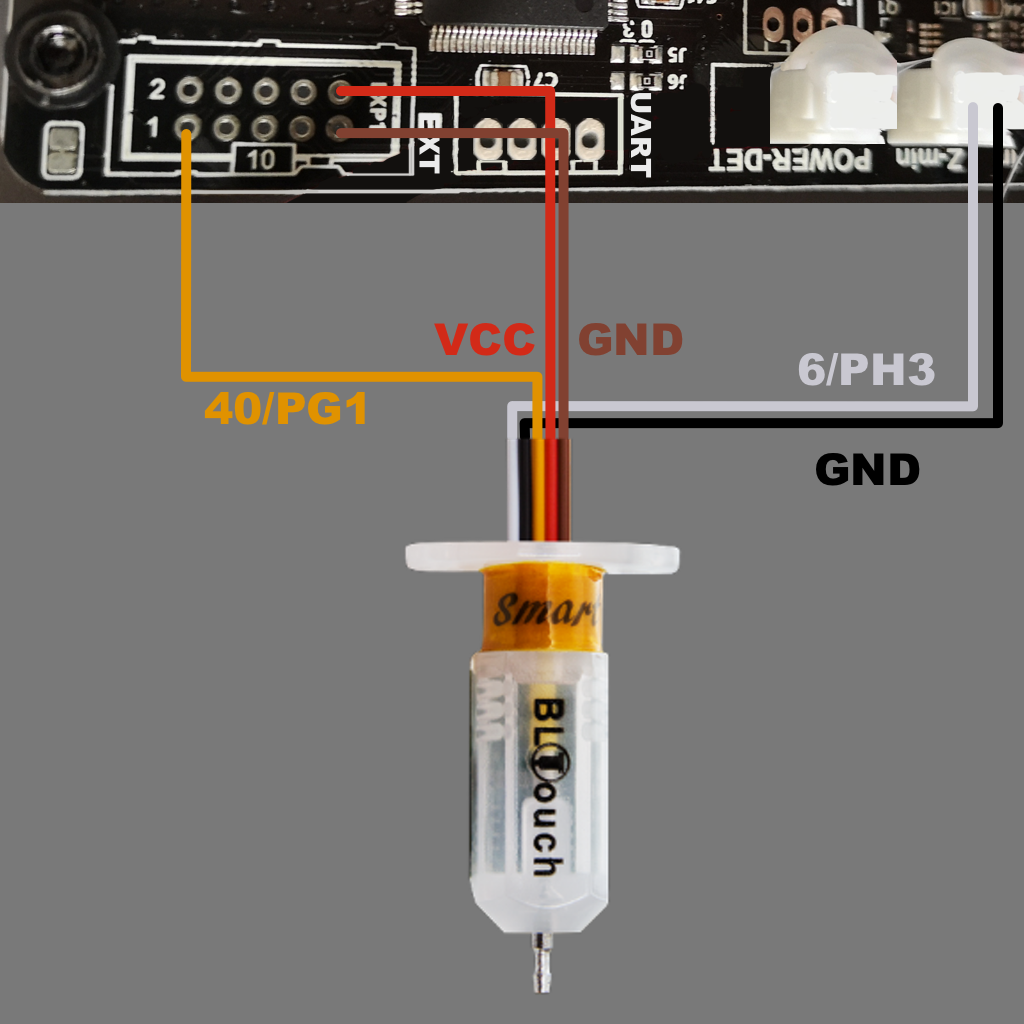
The wiring is the following:

| BLTouch wire | Connector | Pin # | Atmel | Description |
|---|---|---|---|---|
| White | Z-Probe | 2 | PA3 | Z-endstop |
| Black | Z-Probe | 3 | GND | Ground |
| Orange | EXT | 1 | PG1 | Servo 0 |
| Red | EXT | 10 | VCC | +5V |
| Brown | EXT | 9 | GND | Ground |
Notes:
- There is no need to change the jumper near Z-probe since the related pin (pin #1) is not used.
- You can remove the Z-min enstop switch. It is no more used.
¶ For Aldi Balco 3D Printer (model HE180021) only
The wiring is the following:
| BLTouch wire | Connector | Pin # | Atmel | Description |
|---|---|---|---|---|
| White | Z-min | 1 | PH3 | Z-endstop |
| Black | Z-min | 2 | GND | Ground |
| Orange | EXT | 1 | PG1 | Servo 0 |
| Red | EXT | 10 | VCC | +5V |
| Brown | EXT | 9 | GND | Ground |
¶ Step 5 - Flashing the Mainboard
You can now flash the Mainboard part as described in How to Flash. Be sure to flash the part with BLTouch support.
¶ Step 6 - Leveling Settings
The firmware does not know which support you use so you have to tell it:
- Go in Settings / Sensor:
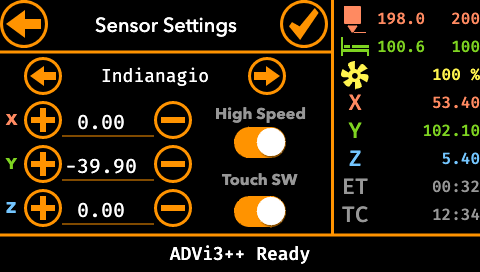
- Press the left or right arrow near the name of support (Indianagio in the screenshot) to choose the right support
- If your support is not in the list, choose the last one Custom
- Press the Plus and Minus buttons to adjust the position of the sensor. In general, you only have to set X and Y offsets.
- The Z offset is set using Z-height Tuning (see below).
¶ Step 7 - Testing
- Power-on your printer.
- The BLTouch has to light up (red).
- Go into the Tuning / BLTouch.
- The following panel appears:
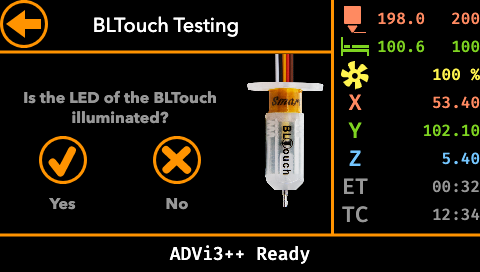
Follow the instructions to check the different wires of the sensor.
¶ Step 8 - Z-height Tuning
Note: You only have to do this from time to time especially if you move or disassemble parts such as the extruder.
- Go into Leveling / Z Height:
- The head with move to its home position (at the center of the bed)
- The Z-height adjusting panel is displayed:
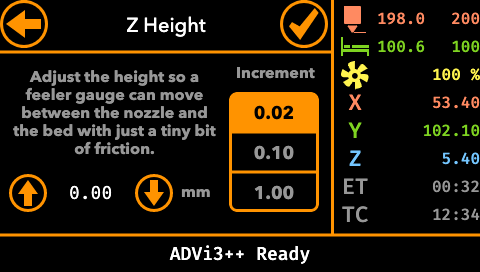
- Choose a Multiplier (0.02, 0.10, 1.00 mm) and press on the
+or-button. It will change the position of the head along the z-axis with the selected Multiplier value. Adjust the height until a feeler gauge can move between the nozzle and the bed with just a tiny bit of friction. Personally, I am using a 0.1mm gauge. - Once it is done, press the Continue (top-right) button.
¶ Using BLTouch
¶ Rough Bed leveling
The automatic bed leveling is good to compensate small deviations. Not big ones. So it is still recommended to perform a Rough Bed Leveling after the installation of a BLTouch.
¶ Automatic Bed leveling
Tap Leveling / Automatic to start the automatic bed leveling.
- It first home the 3 axes.
- Then, it measures 9 points on the bed.
- Once the measuring is finished, it displays the result in a grid:
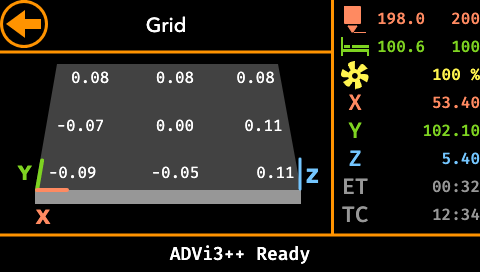
- Tap the checkmark button to accept these measures and save them into memory and EEPROM.
¶ G-Codes
The following G-Codes are involved in automatic bed leveling:
| G-Code | Name | Description |
|---|---|---|
G28 |
Auto Home | Auto-home one or more axes. It does not disable bed leveling compensation, contrary to older versions. |
G29 |
Automatic Bed Leveling | ABL probes the bed and enables bed leveling compensation. It is required to auto home (G28) before. |
M420 |
Bed Leveling State | Get and/or set the enabled state of bed leveling compensation. For example, M420 S1 enables it. |
The following topic gives examples of starting and ending G-code for different splicers.
¶ Starting and Ending G-Code with BLTouch
¶ Cura
Note: The following codes are sending a
M420 S1afterG28. It is not required with recent versions of ADVi3++ (thanks toRESTORE_LEVELING_AFTER_G28) but it does not harm.
Example of Starting G-Code for Cura:
G21 ; metric values
G90 ; absolute positioning
M82 ; set extruder to absolute mode
M107 ; start with the fan off
M140 S{material_bed_temperature_layer_0} ; Set bed temperature (no wait)
G28 X Y F6000 ; move X/Y to min endstops
G28 Z F1200 ; move Z to min endstops ; raise the nozzle
G28 X Y F6000 ; move X/Y to min endstops
M190 S{material_bed_temperature_layer_0} ; wait for bed temperature to reach target
M104 S{material_print_temperature_layer_0} T0 ; set extruder temperature (no wait)
G29 ; auto-leveling
G28 X Y F6000 ; move X/Y to min endstops, may disable bed leveling
M420 S1 ; enable bed leveling compensation
M109 S{material_print_temperature_layer_0} T0 ; set extruder temperature and wait
M300 P200 ; beep to indicate that the temp is reached
G1 Z15 F1200 ; raise to have room
G92 E0 ; zero the extruded length
G1 F140 E30 ; extrude 3cm of feed stock
G4 S2 ; Wait for 2 seconds
G92 E0 ; zero the extruded length
M117 Printing...; message
Example of Ending G-Code for Cura:
M104 S0 ; extruder heater off
M140 S0 ; heated bed heater off
M107; Turn fan off
G91 ; relative positioning
G1 E-1 F300 ; retract the filament a bit before lifting the nozzle to release some of the pressure
G1 Z+2.0 F6000 ; move Z up
G1 E-5 F300 ; retract filament even more
G90 ; absolute positioning
G1 X0 F6000 ; move X to min endstops so the head is out of the way
G1 Y160 F6000 ; move the bed so it is easy to access to the printed part
G92 E0 ; zero the extruded length
M84 ; steppers off
¶ Simplify3D
Example of Starting G-Code for Simplify3D:
G21 ; metric values
G90 ; absolute positioning
M82 ; set extruder to absolute mode
M107 ; start with the fan off
M140 S[bed0_temperature] ; Set bed temperature (no wait)
G28 X Y F6000 ; move X/Y to min endstops
G28 Z F1200 ; move Z to min endstops ; raise the nozzle
G28 X Y F6000 ; move X/Y to min endstops
M190 S[bed0_temperature] ; wait for bed temperature to reach target
M104 S[extruder0_temperature] T0 ; set extruder temperature (no wait)
G29 ; auto-leveling
G28 X Y F6000 ; move X/Y to min endstops, may disable bed leveling
M420 S1 ; enable bed leveling compensation
M109 S[extruder0_temperature] T0 ; set extruder temperature and wait
M300 P200 ; beep to indicate that the temp is reached
G1 Z15 F1200 ; raise to have room
G92 E0 ; zero the extruded length
G1 F140 E30 ; extrude 3cm of feed stock
G4 S2 ; Wait for 2 seconds
G92 E0 ; zero the extruded length
G1 X5 Y5 F2000; Move a little over the bed
M117 Printing...; message
Example of Ending G-Code for Simplify3D:
M104 S0 ; extruder heater off
M140 S0 ; heated bed heater off
M107; Turn fan off
G91 ; relative positioning
G1 E-1 F300 ; retract the filament a bit before lifting the nozzle to release some of the pressure
G1 Z+2.0 F6000 ; move Z up
G1 E-5 F300 ; retract filament even more
G90 ; absolute positioning
G1 X0 F6000 ; move X to min endstops so the head is out of the way
G1 Y160 F6000 ; move the bed so it is easy to access to the printed part
G92 E0 ; zero the extruded length
M84 ; steppers off